www.beadsbaublesandjewels.com
1601-3 Print | Close [X]
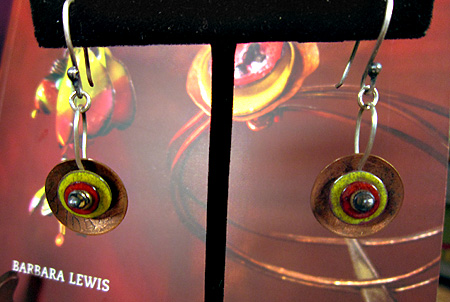
Barbara Lewis paints with fire to create her signature disc drive earrings.


Note: Always wear safety eyewear when using all mechanical tools. Follow manufacturers safety instructions when using tools and torches.

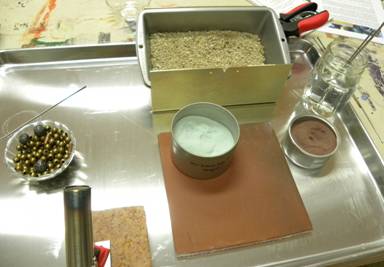
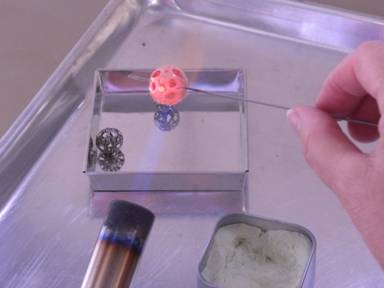
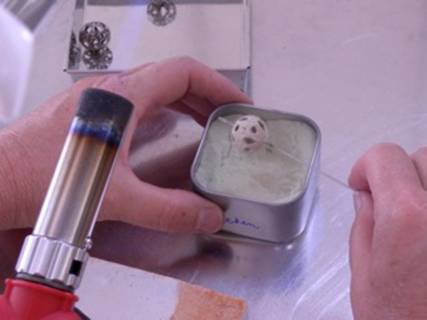
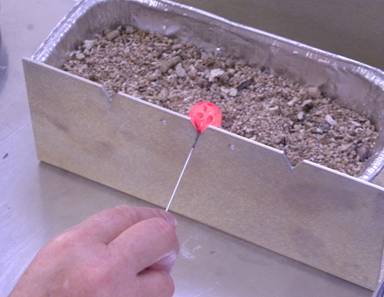
What makes the Painting with Fire technique of torch firing so special?

I love teaching Painting with Fire (PWF) workshops because I get high off the enthusiasm of my students!  Who wouldn’t love to see a stream of happy faces leave a workshop?  Can you imagine enameling 50 beads in an afternoon as a rank beginner?  How about enameling a bead in 40 seconds?  No, I’m not crazy!

It’s a simple technique and easy to learn. It’s also affordable because there are few tools involved and the ones needed are inexpensive. Let me walk you through the technique.
Here’s a photo of the torch.  The fuel is a 1 lb. canister of map gas.  It burns hot and clean and can be found at nearly any hardware store (Lowe’s, Home Depot, Ace, True Value, etc.)  Plumbers commonly use map gas. It costs between $7 and $10 per canister and gives 8 hours of steady firing.  We have all of the tools and several enamels conveniently packaged in a kit for sale at my website, except for the map gas, which you’ll pick up at the hardware store!  Around the gas canister you’ll notice a hose clamp and angle bracket used for clamping the torch to the table, which makes for a very safe firing experience.  Make sure that the nozzle of the torch and the angle bracket are facing in the same direction.

                  Macintosh HD:Users:drjameslewis:Desktop:Jewelry Blog:Photo 1 - Torch.jpg

The rest of the workstation looks like this …

                  Macintosh HD:Users:drjameslewis:Desktop:Photo 2 - Work Station Set-Up.jpg

This is the set up for a right-handed person.  The torch is on the left and the patent pending bead pulling station is on the right (that’s the metal contraption with the “v” notch). If you’re left-handed, reverse everything. There’s also a non-flammable work surface, a bread pan filled with vermiculite, enamels, beads, a jar of water, and stainless steel rods called “mandrels.”  The vermiculite simply provides a nonflammable cushion onto which we drop the bead.  The water is used to quench the mandrel between beads. 

Here’s the process …

                   Macintosh HD:Users:drjameslewis:Desktop:Photo 3- Heat Bead.jpg

Put an iron or copper bead on the mandrel. Heat the bead in the flame. When it glows orange, immerse the bead in enamel and tap the mandrel on the side of the metal container to remove the excess enamel.  Repeat the heating and dipping process two more times.

                          Macintosh HD:Users:drjameslewis:Desktop:Photo 4 - Immerse the bead into enamel.jpeg

Remove the bead by pulling it off the mandrel at the bead pulling station.

                          Macintosh HD:Users:drjameslewis:Desktop:Photo 5 - Remove Bead from Mandrel.jpg

That’s it!  There’s no cleaning or pickling of the metal because the heat does that for us.  No Klyr-fire or other fixative is necessary because the enamel immediately begins to fuse to the hot metal when the two come in contact.  We’ve just eliminated two very time-consuming and tedious steps that are necessary in other types of torch firing.
I hope you enjoy the project from the book.  The technique really is as easy as it looks.  We have a community of jewelry artists with a touch of pyromania at www.paintingwithfire.ning.com, where it’s all about torch firing enamel.  I hope you’ll join me there.

Supply website: www.paintingwithfireartwear.com
Author website: www.torchfiredenameljewelry.com
Networking group: www.paintingwithfire.ning.com
Blog:  www.paintingwithfireartwear.blogspot.com
Store: www.shopmixedmedia.com

Barbara Lewis & Katie Hacker

Copyright © 2012 Beads Baubles & Jewels. All Rights Reserved.