By Create Your Style with SWAROVSKI ELEMENTS Ambassador
Laura Timmons of Vintage Moon Creations©
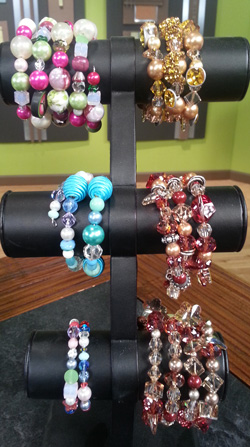
Of course, using memory wire is a very easy, traditional form of simple beading. Feel free to come up with your own combination. Need a use for all of those extra beads laying around? That’s what I like to call: Bead Soup for the Soul. As long as it has a hole – you can string that baby! The sky is the limit on this project. Below though is a fantastic combination that I taught in Tucson. Enjoy!
Brighten your day, with this amazing combination of product, all with one of the latest innovation colors: Sunflower. You will create two different projects: a bracelet, and earrings each containing bunches of luscious crystals, and unusual products such as crystal mesh. Just as fresh as Kansas sunflowers!
SWAROVSKI ELEMENTS Needed:
*5810, Pearl, 12mm, Gold, quantity 12
*5810, Pearl, 8mm, Light Gold, quantity 11
*5000, Round, 8mm, Crystal Golden Shadow, quantity 20
*5328, Xilion, 10mm, Sunflower, quantity 10
*5600, Corner Drilled Cube, 8mm, Crystal Golden Shadow, quantity 10
*1770, Button, Sunflower, quantity 20
*5530, Aqualine Bead, 18mm,Crystal Golden Shadow, quantity 8
*52000, Crystal Mesh, 5 rows x 10 inches, Sunflower
Additional Supplies:
*Parawire, Memory Wire, cut into length where it wraps three times around your wrist
*2 Earring wires in silver
*2 eye pins in silver
*Angle Edge Cutters
*Round Nose Pliers
*Bent Nose Pliers
*Old pair of scissors
Tips: You might want to use some really old cutters when cutting your memory wire. When adding your beads to your memory wire, it might “grow” a little bit on you-don’t panic! Once you have all of your beads fed onto your wire, put your bracelet on, and re-shape your wire to the size you desire.
Getting Started:
The Earrings-First you will cut your two pieces of crystal mesh. Cut them 7 rows of crystals in length, and 4 rows of crystals wide with your scissors. Open up your eye pins – remember always open it up, moving the ring forward or backward, not out to the side. If you open it up to the side, it may break eventually. Slide a corner of your mesh onto the loop. Now close up that loop as close as you can to the base wire. Slide on of the Crystal Golden Shadow Rounds, then your three buttons, and then another Crystal Golden Shadow Round. You will now create a basic wire wrap onto the top of your last bead. Now you are ready to feed your earring wire onto your wire wrapped loop-remember also to open this ring up moving the loop end either forward or backward-never out to the side. Now close that loop. ***Repeat for the other earring***
Almost There:
The Bracelet-First things first…cut your three pieces of mesh. You will cut three pieces of mesh, 11 rows of crystals in length, and 4 rows of crystals wide. You will then create a simple little loop (similar to what a loop on your earring wire looks like) with one end of your memory wire. You will now start stringing your beads in this order (Keep in mind, you are more than welcome to string them however your little heart desires-be creative!)
*Crystal Golden Shadow Round
*8mm Pearl
*Aqualine Bead
*8mm Pearl
*Button
*Crystal Golden Shadow Round
*12mm Pearl
*Aqualine Bead
*8mm Pearl
*Sunflower Xilion
*Cubed Crystal
*12mm Pearl
*Aqualine Bead
*8mm Pearl
*Button
*Crystal Golden Shadow
*Cubed Crystal
*12mm Pearl
*Button
*Aqualine Bead
*8mm Pearl
*Crystal Golden Shadow
*Sunflower Xilion
*Crystal Golden Shadow
*12mm Pearl
*Aqualine Bead
*8mm Pearl
*Button
*Crystal Golden Shadow
*****Now you will add your crystal mesh – slide the mesh into the first hole up from the first row of crystals that is directly in the middle. Slide one of your 12mm Pearls onto the wire, and wrap the crystal around the Pearl, and feed the wire into the same hole, but onto the opposite side of your mesh. This should wrap your pearl with crystal mesh onto your wire. You will need to keep the mesh and pearl next to the end of your memory wire, in order to create this look.
*Crystal Golden Shadow Round
*****Repeat crystal mesh process as above
*Crystal Golden Shadow
*****Repeat crystal mesh process as above
*Crystal Golden Shadow Round
*Button
*12mm Pearl
*Cubed Crystal
*8mm Pearl
*Sunflower Xilion
*Cubed Crystal
*12mm Pearl
*Crystal Golden Shadow Round
*Button
*8mm Pearl
*Aqualine Bead
*12mm Pearl
*Sunflower Xilion
*Cubed Crystal
*8mm Pearl
*Crystal Golden Shadow Round
*Button
*8mm Pearl
*Aqualine Bead
*12mm Pearl
*Sunflower Xilion
*Crystal Golden Shadow Round
*8mm Pearl
*Cubed Crystal
*Button
*8mm Pearl
*Aqualine Crystal
*12mm Pearl
*Sunflower Xilion
*Crystal Golden Shadow Round
*8mm Pearl
The Finishing Touch:
You may need to cut off some excess wire-leaving about ½ inch of wire left. You will create a small loop at this end as well, securing your beads in place on the memory wire. Tada!
©2012 Vintage Moon Creations, Laura R. Timmons, www.laurartimmons@gmail.net, www.vintagemoon.net
“Sparkle” your Imagination….”Embellish” Your Creativity!™
 
|