www.beadsbaublesandjewels.com

BBJ – the source for jewelry making, beading, and metal work:  instructions, education and  projects from leading jewelry  designers, and instructors.  The online home of the public television program.
1903-3 Print | Close [X]

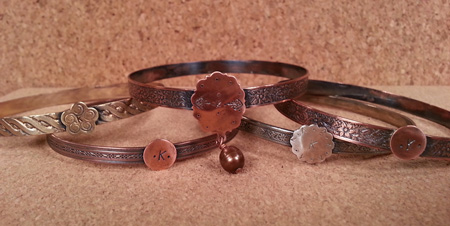
Kate Richbourg shares a no fail soldered bracelet.


For More Information Visit:


www.beadalon.com


www.jewelrytools.com


Tools:
Bracelet Gauge
Bracelet Mandrel
Plastic Mallet
French Shear
Max Flame Torch
Charcoal Block
Copper Solder Paste
Flower Patterned Wire Copper
Power Max Cutter
Titanium Solder Pick
Cool Cup
Chain nose and bent chain nose pliers
Bench Block
Copper circle blanks ½”
Letter stamp set, 3-4 ‘
Diamond File set
Solderite Board
Ultra Polish Pads

Steps:

  1. To determine the length needed for the bangle wire, size wrist using bracelet gauge. The average sized bangle is between 8 and 8 ½”. Use a ruler and measure the patterned copper wire and cut to length with flush wire cutters.
  2. Use pliers or hands to shape the wire into a bracelet and fit ends flush. File ends if needed to make ends flush.
  3. To generate enough heat to solder the open bracelet make a little “oven” out of your charcoal blocks. Lay one flat on a Solderite board and place the other two so they meet at the corner. Lay the solder join in this corner. As you heat the piece for soldering , the corner will capture and retain the heat of the torch and bring your metal to soldering temperature faster. Solder using copper paste solder.
  4. Quench piece and clean in a pickle pot. Dry piece thoroughly.
  5. To make bracelet round, slide the soldered bracelet on a round bracelet mandrel and tap gently using a plastic mallet.
  6. Place stamped metal circle face down on the charcoal block and add a small amount of solder to the back.  Place the bangle with the seam facing down and the bangle braced against the corner charcoal blocks to keep it upright while soldering.  Solder as above.
  7. Quench piece and clean in a pickle pot. Dry piece thoroughly.
  8. Add patina to the finished piece if desired and polish using steel wool or a polish pad.  You may also finish the piece in the tumbler.

For more information visit www.katerichbourg.blogspot.com


Kate Richbourg & Katie Hacker
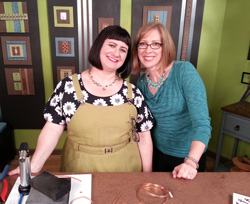
Copyright © 2013 Beads Baubles & Jewels. All Rights Reserved.