SWAROVSKI ELEMENTS Needed:
*Strand 1: 5000, Round, Caribbean Blue Opal, 8mm, quantity 16 (2 for the finishing)
*Strand 2: 5328, Xilion, Caribbean Blue Opal AB, 4mm, quantity 84
*Strand 3: 5328, Xilion, Sahara Blue AB2x, 6mm, quantity 14
Note: When recreating this necklace, do not use 8mm on more than one strand, or your beads will be too heavy for your wire
Additional Supplies:
*28 gauge non-tarnish silver wire
*crochet hook-size “I”
*silver toggle
*bent nose pliers
*angle edge cutters, or your favorite cutting tool
Tips:
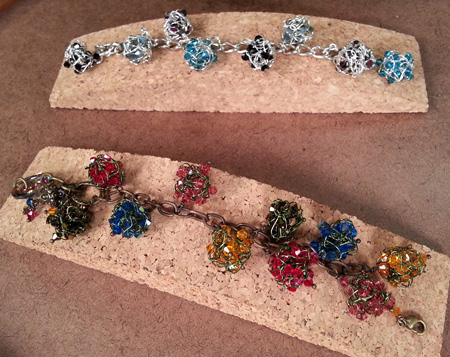
*When crocheting your wire, it is not necessary to vary your different beads on each strand, use the same color on each strand – once you braid your strands together, it creates the varied effect.
*When crocheting your wire, don’t get caught up in trying to create perfect circles. You will never notice them once you have braided your piece. Some of the more unusual and interesting pieces, are created with inconsistent chains. As long as you keep consistency in your size (about the size of a large pea) your gauge will be fine.
*If you need to extend the length of your necklace, you can add additional beads to the end of your piece. If your necklace is longer than you would like, you can gently “scrunch” the wire to shorten.
Getting Started:
You will be creating three individual strands of crocheted chain stitch lengths with captured beads, which one of the strands will be with the beads that you make, then braiding these three strands together for your necklace.
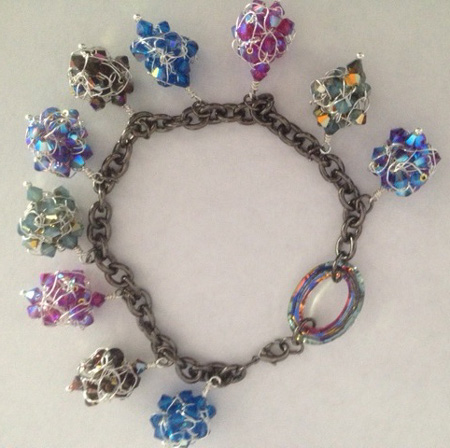
- You will first want to create your 14 beads for one of your strands. Feed 6 of the Caribbean Blue Opal AB Xilion beads onto your wire. With a very small “tail” chain 6 chain stitches capturing one of your Xillion beads into each chain stitch. At the end, cut your wire with a small “tail” and pull that tail through the last chain. Next you will just “roll” your length together to create a small ball, tucking your ends inside of your ball. Continue this for another 13 times, until you have created a total of 14 crocheted beads.
- Thread your 14 8mm Caribbean Blue Opal beads for Strand 1 onto your wire. Leaving a good 5” of wire at the beginning, chain 10 empty chain stitches with your hook and wire. Then sliding a bead against the last chain, chain as though the bead isn’t there – the bead will capture itself in the center of that chain. Alternate then, an empty chain, and a captured bead, until all the beads are used. Then chain an additional 9 empty chain stitches. Cut your wire leaving a 5” tail of wire, chain one more time pulling your wire gently through the last chain (creating chain 10). Repeat this step two more times with your Sahara 2XAB Xillion beads, and with your created beads. Flatten each strand some with your fingers, so that they lay flat.
- Lay all three strands together, matching up the center point of each strand, so when you are braiding, the beads will be evenly distributed. Twist one end of the loose wires of the chain stitched pieces together. (Keep in mind, your ends may not match evenly. Twist your wires together at the longest point of your wire – once you start braiding, you will never see the empty wire strands.)
Almost There:
You will then begin braiding the three strands of wire together. It’s always amazing how the beads just fall into place, one after the other. If they don’t, you can shift the beads around some. Once you have reached the other end of the chain stitches, twist together those ends together as well (at the furthest chain stitch point).
The Finishing Touch:
Slide one crystal finish bead onto each end, right up to the chain stitching. Then thread one part of the toggle and bend wire over to create a wire wrapped finish in between the crystal beads and the bottom of the toggle. Clip the ends as close as you can, and use your bent nose pliers to smooth down the edges. Repeat this process on the other side of your necklace. Now you are ready to show off your beautiful necklace!
©2010Vintage Moon Creations, Laura R. Timmons, vmc@kc.rr.com, www.vintagemoon.net
Find me on “Linked In” and “Facebook” too!
“Sparkle” your imagination….”Embellish” your creativity!
|