Swarovski Elements:
*From Dreamtime Creations:Various sizes and colors (to match your ties) of Swarovski Hotfix crystals.
*From Dreamtime Creatins: Various sizes and colors of crystals you may want to wire wrap onto your cuff
Additional Supplies:
*Dreamtime Creations Rhinestone Adhesive Glue
*Artistic Wire from Beadalon – 24 gauge – any color desired, about 20 inches in length
*From Dreamtime Creations: 1 and ½ inch metal cuff
*From Dreamtime Creations: 1 and ½ inch strip of faux suede in color to match tie.
*From Dreamtime Creations: 1 hotfil tool
*Shop your local Salvation Army for a wonderful selection of very cheap, very retro, very cool ties. The tie I used was only 89 cents!
*Sheet of paper, and a pencil
*Scissors
*Several Wooden Clothespins
Getting Started:
Using your piece of paper and pencil – roll your cuff from side to side – tracing with your pencil. You will want to cut out your pattern with about a ½ inch additional width. Next you will trace your cuff again, this time when you cut it out, taking away about ¼ inch from your pattern all the way around. This will be your template for the inside of your cuff.
Cut your tie open, and lay flat. You may need to press it flat with an iron. Next, add a line of glue along the entire outer edge of your cuff. Place your cut tie length, making sure you have it centered, along the cuff. You can slide it a bit into place if you need to. Now you will add a thin line of glue along the inside edge of your cuff. Fold the edges of your fabric to the inner portion of your cuff. You might need to place the wooden clothespins to the fabric along the edges, holding it in place until it dries.
Almost There:
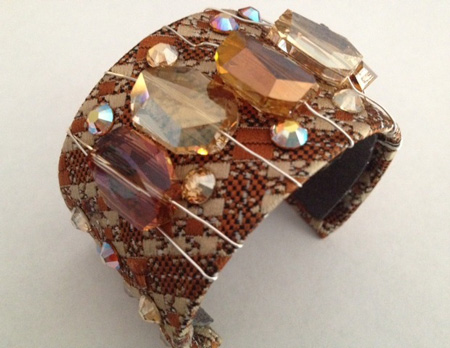
With your length of wire – string your beads in the pattern you would like to use them – keep in mind, you really don’t have to have any specific pattern in mind, you can just place them randomly if you like. Starting from one end – secure your wire along the back, start wrapping your wire with the crystals around your cuff. You don’t want any crystals under the cuff (obviously, why waste them – they will not show). Once you have made several wraps with your wire and crystals, secure the other end of your wire, by wrapping it on the inside, nice and tight, and cut your wire very short – all of this will be hidden inside the suede lining. Now you will add a thin line of glue to the inside of your cuff, place the faux suede lining on the inside, making sure not to let any of the glue touch the top surface of your lining. You may want to clothespin this in place, and wait for it to dry, before the next step.
Finishing Touch:
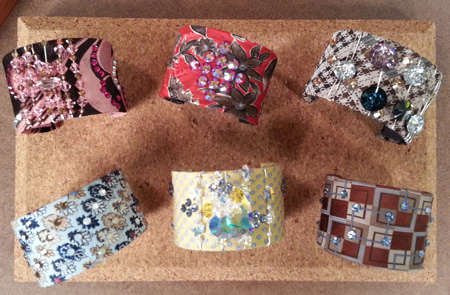
Now is the glorious time to add some additional bling to your bracelet! This is where your Hotfix tool, and hotfix flatbacks come in – just read the instructions on your package, and get creative! Your design can be strategic, and precise, or you can be all over the cuff -you might even want to play off the patter of the tie – the choice is yours.
©2013Vintage Moon Creations, LauraR.Timmons, laurartimmons@gmail.com, www.vintagemoon.net
“Sparkle” your imagination….”Embellish” your creativity!
 
|