www.beadsbaublesandjewels.com

BBJ – the source for jewelry making, beading, and metal work:  instructions, education and  projects from leading jewelry  designers, and instructors.  The online home of the public television program.
2010-2 Print | Close [X]

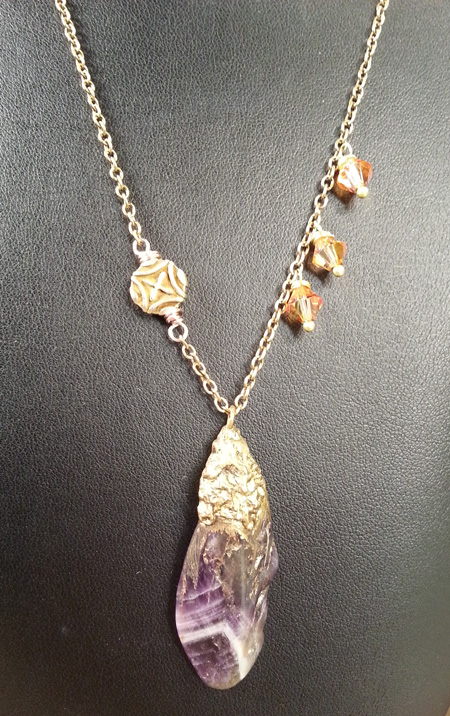
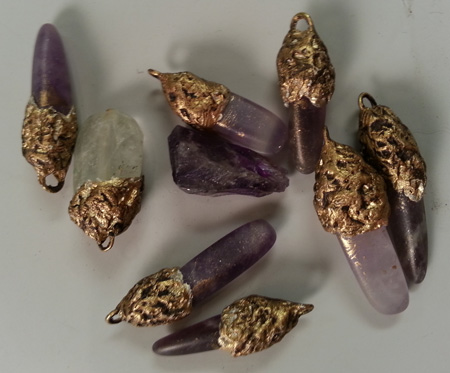
Andrew Thornton shares one of his favorite new jewelry making techniques on making decorative end caps using epoxy clay.

For More Information Visit:


www.beadalon.com

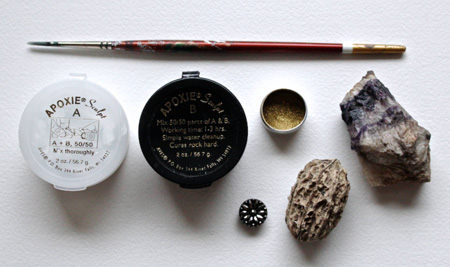
Rustic Epoxy Clay Bead Caps

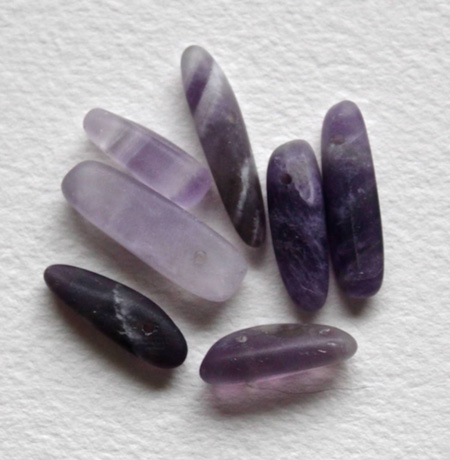
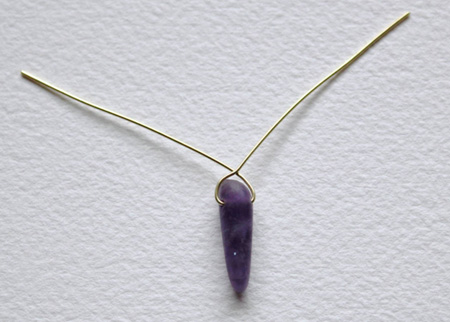
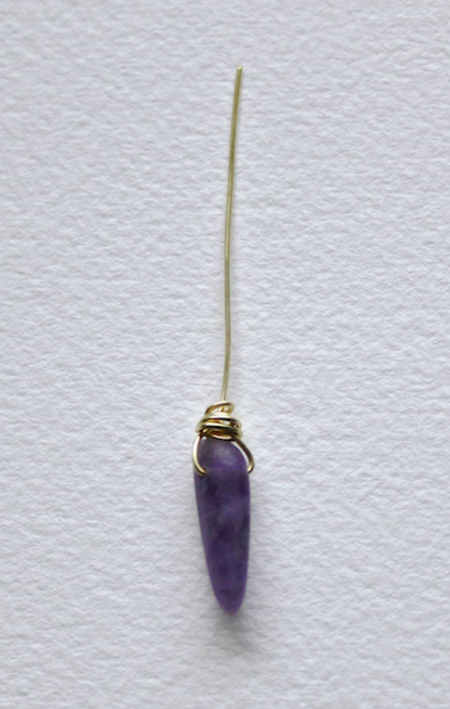
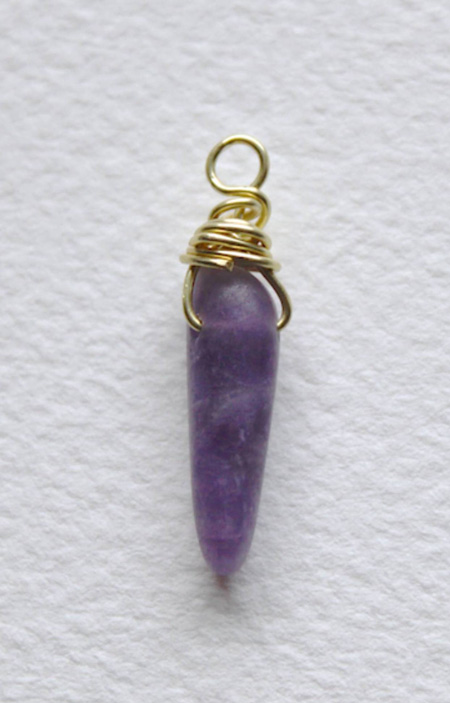
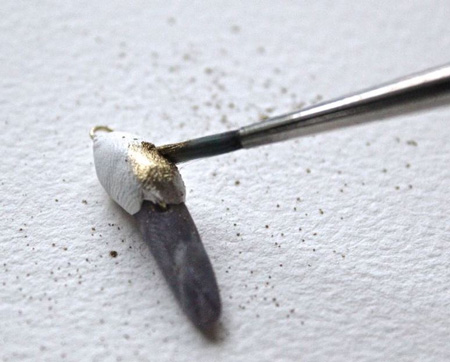
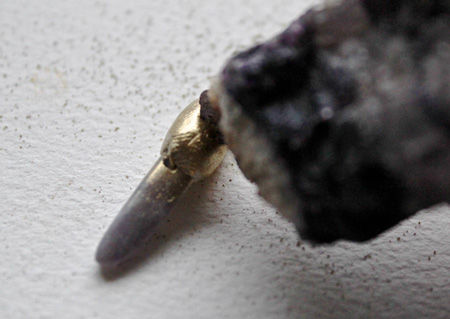
This project is excellent for hiding less than tidy wire-wraps and adding embellishment to a stone.

  1. Cut a 4” piece of wire.  (Make sure that it is dead-soft or half-hard and is easy to manipulate.)  Center your stone and fold up both ends of the wire.  Cross the wires and wrap one tail around the stone.  Create a wire-wrapped loop with the remaining tail and tuck the end of the wire into the coils of the previous tail.  If you’re using dead-soft wire, use a nylon or rawhide hammer to gently work-harden the loop.

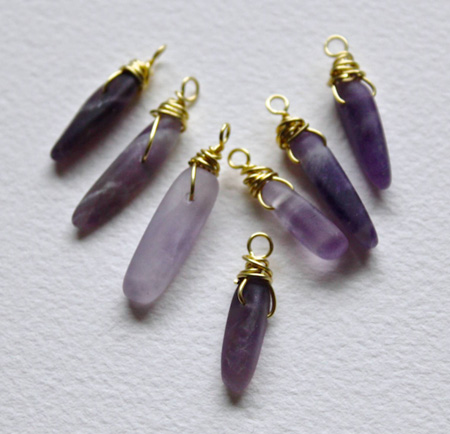
Tip:  If you are doing several caps, prepare all of your wire-wraps in advance.  I usually do extra just in case I end up with extra epoxy clay.

  1. Mix epoxy clay according to manufacturer’s instructions.  Not all epoxy clays are the same and it’s important to follow the directions carefully, so that the clay cures properly.  Depending on the size of the stone, how big your wire-wrap is and how big of a cap you want, you’ll roughly need 2 grams per bead cap. 

Safety:  Not only do glove help prevent the clay from sticking to your hands, but it also helps if your skin is sensitive.  If you do use your bare hands, make sure to wash your hands with warm, soapy water afterwards.

Tip:  Set down wax paper before working with epoxy clay or pigment powders for fast clean up.

  1. Pull off a piece that’s about the size of a chickpea and roll it into a ball.  Flatten the ball and press the top of the wire-wrap into the clay.  Smash the clay all around the wire-wrap.  Cover completely.  If any wire is poking out, use a cuticle stick to press the wire in and take a small piece to cover it.  Make sure to press the clay firmly, so that the clay adheres to the stone and wire.  If you are worried about adhesion, use a bit of sandpaper to rough up the wire and the part of the stone that will be covered with clay.  Make sure to smooth down the edges and that the loop is still present.  If your loop gets buried in the clay, use your cuticle stick to dig out the hole.
  2. Apply metallic powder with a soft brush to the surface of the clay.  Not only will this give the clay color, but it’ll also act as a resist for your texture.  (If you are going to embed crystals, do this BEFORE you coat the clay with powder.)


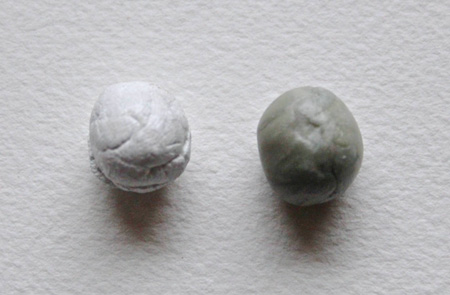
Safety:  Metallic powders and pigments often times contain very finely ground metal that may be harmful to your health.  Make sure your area has plenty of ventilation and if you’re using a lot, you might want to wear a dust mask.  Alternatively, you can use cornstarch and add color afterwards with Glider’s Paste, alcohol inks, or metallic acrylics.  Spray finish all to prevent your finish from wearing off.  Most fine powders, such as marble dust or mica dust will work as a resist and give a different effect.

  1. Use a rock, button, or texture tool to apply texture.  If what you’re using to apply the texture starts to stick, powder the area again.  If you are using a pattern, press firmly and try not to go back over the design again.  Going over multiple times will muddy the design.

  1. Allow the clay to completely cure.  Once it has cured, you can paint on a sealer or you can tape off your stone with painter’s tape and use a spray fixative.  To bring out the details in your texture, go back over with a darker color and wipe off.  Once the paint is dry, go over again with a sealer.

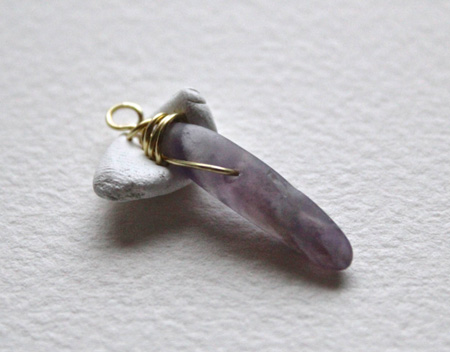
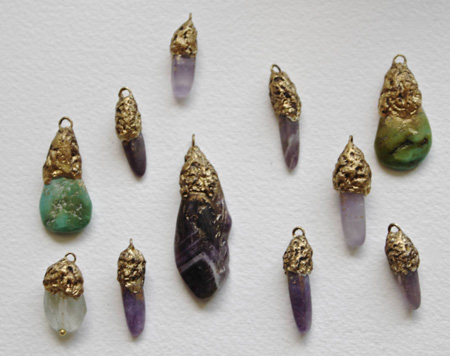
Tip:  You can customize the look of your caps with the textures you use and how you decide to finish your pieces.  You can add color,  metallic finishes, or go for a more natural look with a dark colored epoxy clay and a matte spray finish.

Once the caps are done, they can be used in customized jewelry with an organic look.

Andrew Thornton & Katie Hacker

Copyright © 2014 Beads Baubles & Jewels. All Rights Reserved.