401-1
Coin Necklace
By Stephanie Girdlestone
Material needed
- 20” curb chain F14-1170CH
- Sterling silver and copper coin clasp F14-6165FN
- Brass jump rings, 6mm 20-gauge (1 pkg of 100) F14-3570FN
- Silver plated jump rings 5.5mm 20 gauge (1pkg of 100) F14-3590FN
- Sterling Silver drop F14-7937FD
- Sterling Silver spiral drop F14-8662FN
- Sterling Silver drop F14-8666FN
- Antique brass octagon coins (1 pkg of 50) F14-4496FD
- Aluminum Chinese coins (1pkg of 100) F14-K09-8644FN
- Antique brass coins, happiness symbol (1pkg of 50) F14-4497FD
- East Indian coins (1 pkg of 10) F14-K-0-4154FN
- Chinese coins (1pkg of 20) F14-3625FN
- Swarovski® baroque drop, ruby F14-2667CY
- Swarovski® baroque drop, crystal F14-2660CY
- Sterling silver drops (2pkgs) F14-8662FN
- Swarovski® ½ drilled pearls, mauve 6mm (2pkgs) F14-1088GP
- Swarovski® ½ drilled pearls, copper 6mm (2pkgs) F14-1087GP
- Swarovski® ½ drilled pearls, black 6mm (2pkgs) F14-1085GP
- Swarovski® ½ drilled pearls, Tahitian 6mm (2 pkgs) F14-1082GP
- Swarovski® ½ drilled pearls, cream 6mm (2pkgs) F14-1071GP
- Steel hole punch F14-3084TL
- Pendant Bail-Bead holders (2 pkgs) F14-8764FN
- E6000 adhesive F14-1949TL
- Wire Cutters F14-1545TL
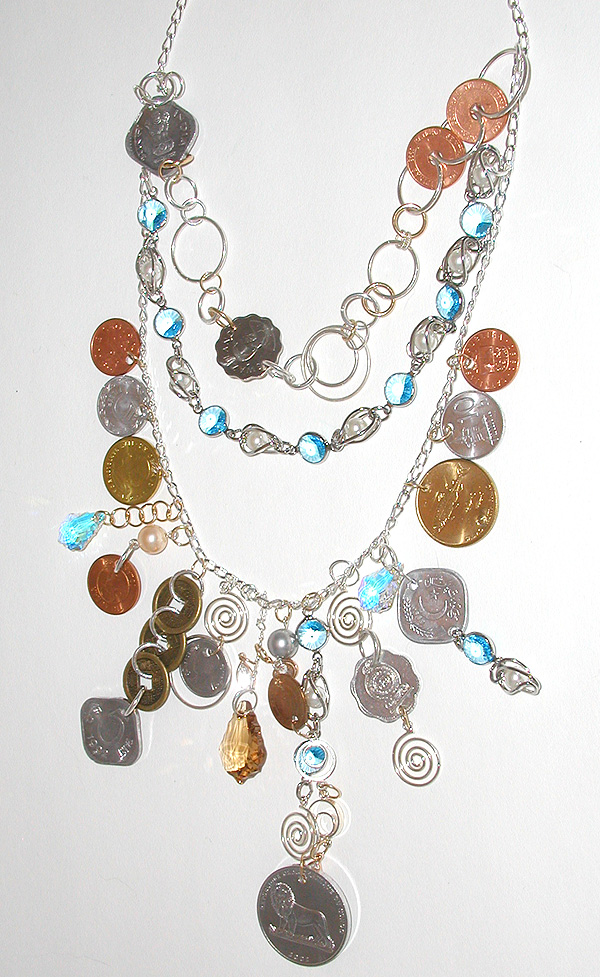
CREATING THE MAIN CHAIN
Turning the coins into dangles
Step 1: Select the desired coins for this project. Note: Coins that are
lightweight and thinner are easier to punch holes in for hanging.
Step 2: Determine if the coins need to have one or two holes punched and
where you’d like them.
Step 3: Punch holes using the steel hole punch tool.
Step 4: Place a coin onto a jump ring, to be used later as dangle. Add
other findings, chain, coins and crystals to jump rings for use later
as well. Feel free to use varied items to create interesting drops. This
is a good place to use those “one of a kind” pieces you’ve
picked up here and there.
Making pearl drops
Step 5: Using wire cutters, trim the pin on the bead holder to about ¼”.
Place the pearl onto the pin to see if this will be a good length. If
the pearl doesn’t sit flush; trim the pin a little further.
Step 6: Add a drop of adhesive to the pin, place a ½ drilled pearl
onto the pin and let set.
Step 7: Link a jump ring through the loop on the bead holder, so you can
attach the pearl drop to the chain later.
Assembling and embellishing the chain
Step 7: Open the jump rings on the end of the curb chain and remove the
clasp. Replace the claps with the decorative coin clasp.
Step 8: Hang the chain on a display head or other form that can hold the
necklace for you while you work on it. This will make attaching the drops
easier as the chain tends to flip, and if it does, you may attach your
drops to the “wrong” edge of the chain, causing things to
lie incorrectly.
Step 9: Place a coin on a jump ring; repeat to complete 6. On the chain,
measure 7” down from the clasp; link 3 jump ring/coin combinations
at this point. Repeat on the other side so each side mirrors the other.
Step 10: Find the center of the chain between the coins added in Step
9 and place a jump ring with a dangle or drop linked on. As this will
be the focal point of the necklace, the drop you choose should be the
longest and also the most ornate.
Step 11: Fill in the remaining sections of empty chain with dangles and
pearl drops. Be creative here. Anything works. You can add as many or
as few drops as you like or feel comfortable with.
CREATING THE SECONDARY CHAIN
Material needed
Swarovski® pearl and crystal chain F14-4682CK
Simply cut chain to desired length and attach with jump rings to the main chain, about 6” down from the clasp on each side.
CREATING THE THIRD CHAIN
Material needed
Various sizes, shapes and metals of coins left over from first chain
Various sizes, shapes and metals of jumprings left over from first chain
Step 1: Using the steel hole punch, punch a hole on each side of the
coins.
Step 2: Link a jump ring through a hole on the coin; close the jump ring.
Link a jump ring through the other hole on the same coin, then link the
next coin on as well; close the jump ring. Continue to link coins together
in a pattern that’s pleasing to you until you have the length you
like. Attach it to the first, main chain, if you’d like, or keep
it separate to wear with your other coin chain, or on its own.
| Project Images | |
 |
|