
503-1
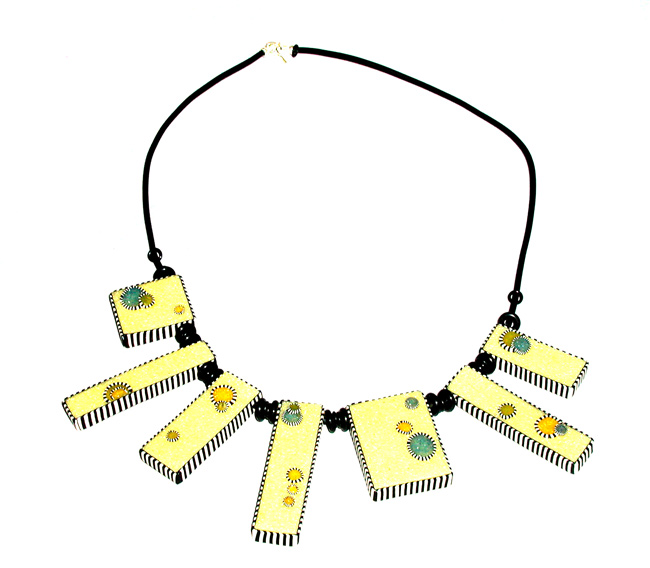
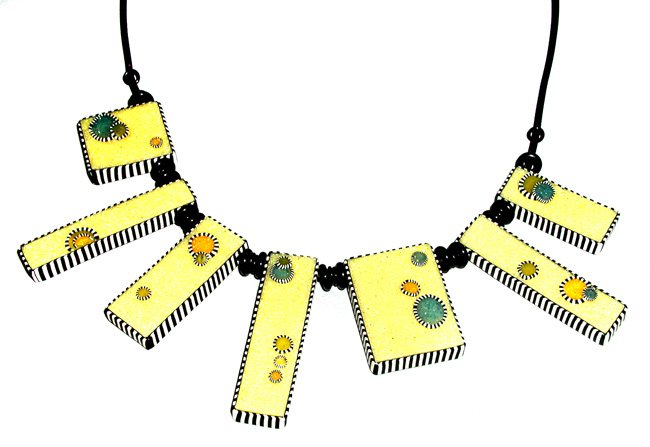
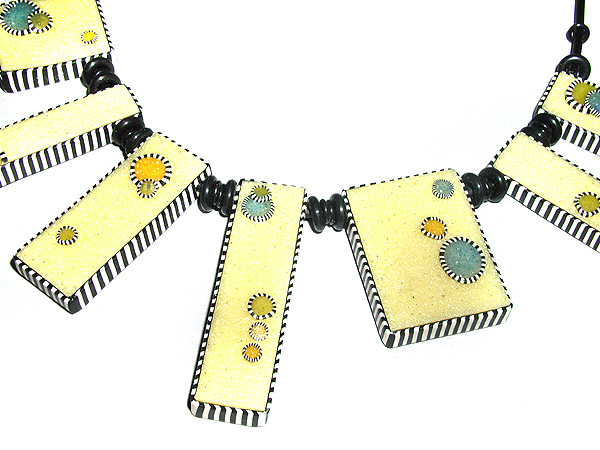
Geometric Necklace
By Judy Belcher
Inclusions are always a fun way to add flair to polymer clay. By incorporating embossing powder (usually used in paper crafts) into the clay, you can achieve the look of stone. The beads of this geometric necklace combine that stone look with fresh pops of color.
Material needed
½ 3 oz. package translucent Kato Polyclay F14-2607BS
½ 3 oz. package white Kato Polyclay F14-2606BS
½ 3 oz. package Black Kato Polyclay F14-2608BS
1/12 3 oz. package Yellow Kato Polyclay F14-2598BS
Pea-sized ball brown Kato Polyclay F14-2609BS
2mm Black Rubber Cording F14-2012BS
Sterling crimp-tube-with-hook F14-8753FN
Sterling crimp-tube-with-loop F14-6912FN
Black Oh! Rings, 7mm F14-8423FD
Black Oh! Rings, 5mm F14-8410FD
Polyclay roller F14-3166TL
Kato NuBlade F14-3141TL
Acrylic rod F14-3070TL
Ranger Distress Embossing Powder in Antique Linen, Peeled Paint, Mustard
and Cobalt
60-grit sandpaper
Needle tool
Instructions
1. All polymer clay must be conditioned prior to use. Either knead chunks
of clay in your hands or fold and roll sheets of clay through the pasta
machine until clay is soft and pliable. Mix an ecru color by combining
½ package of white clay with 1/12 package of yellow and a pea sized
ball of brown; mix until the color is consistent and no streaking appears.
2. Roll out translucent clay into a 7” x 2” sheet, on the
thickest setting of the polyclay roller.
3. Cut the sheet into 4 pieces, one measuring 4”x 2” and the
other three 1”x2”
4. Sprinkle the larger sheet with 1/8 tsp. of Antique Linen Embossing
Powder. Sprinkle the remaining sheets with a pinch of Peeled Paint, Mustard
and Cobalt embossing powder for three accent colors. The embossing powder
should barely cover the surface of the clay.
5. Incorporate the embossing powder by folding the clay in half and pinching
the sides to make a pocket and rolling through the pasta machine.
6. Roll out the Antique Linen clay into a 4”x 2” sheet on
the thickest setting of the pasta machine. Roll each of the other colors
by hand, rolling them into small logs of clay measuring 2” long
and 1/4” in diameter.
7. Roll out black and ecru clay into 4”x 4” sheets on a medium
setting on the polyclay roller. Stack the sheets and, using an acrylic
brayer or rod, roll across the surface to adhere the layers together.
Lay the Antique Linen sheet on top of the stack with the black layer on
the bottom. Because the Antique Linen sheet is made with translucent
clay, it is best to have white clay in between it and the black clay.
Trim and set aside the excess black and ecru.
8. Texture the front and back of the 4”x 2” stack by placing
the black side down onto a sheet of 60-grit sandpaper and pressing a smaller
sheet of sandpaper randomly across the Antique Linen side.
9. Roll the excess black and ecru sheet (from Step 7) through the polyclay
roller on a medium setting, to thin the stripes. Cut the sheet into 8
equal sections and stack to form a striped cane.
10. Cut 6 thin strips from the striped cane and line up side by side,
making sure the black and white stripes are alternating. Adhere the slices
together by gently rolling over the sheet with an acrylic rod. Roll the
striped sheet through the polyclay roller on incrementally thinner settings,
making sure the stripes are perpendicular to the rollers of the pasta
machine. This will lengthen the sheet without distorting or widening the
striped pattern.
11. Wrap each of the 3 logs of clay (formed in Step 6) with the striped
sheet running the length of the log. Reserve the excess striped sheet
for later.
12. Cut each log into 3 sections. Reduce the various sections, by rolling
and stretching to make different sized canes (small, medium and large
diameters) out of each of the colors.
13. Cut 2-3 thin slices from each cane and apply to the textured sheet
formed in Step 8. Cut the sheet into randomly-sized square and rectangle-shaped
beads.
14. Cut 1/4” strips of striped clay from the sheet formed in Step
10 and wrap each of the beads to form a nice striped bezel.
15. Drill through the top of each bead with a needle tool. Bake for 30
minutes at 275°F.
16. Once the bead has cooled, string it onto a length of rubber cording,
using rubber Oh! Rings as spacer beads. Glue or crimp sterling crimp ends/clasp
to finish.
| Project Images | |
   |
|