602-3
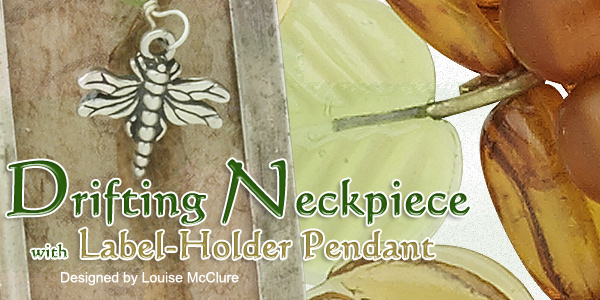
Drifting Neckpiece with Label-Holder Pendant
Designed by Louise McClure
Turn an ordinary label holder into an extraordinary – and reversible – pendant. A Chinese dragon clasp brings fierce style to this asymmetrical design inspiration.
Material needed
1 Clasp, sterling silver dragon F14-3690FD
1 Clasp, sterling silver slide lock with 5 loops F14-5958FN
1 spool Silkon® cord, medium-weight #2, light brown (1 spool/20 yards)
F14-1082BS
1 Amber, 6x4mm oval F14-7667GS
1 Amber, 9x6mm oval F14-7668GS
1 Amber, 7mm round F14-3469GS
1 Golden horn, 6mm F14-4787NB
1 pkg Label holder, silver-plated, 2-1/2x1/4 inches (1 pkg/10) F14-2066PK
1 pkg Clasp, silver-plated lobster claw deluxe (1 pkg/10) F14-3359FN
1 pkg Glass leaf, gold with brass top loop, 19x15mm (1 pkg/12) F14-3033GB
1 pkg Glass leaf, green with brass top loop, 15x13mm (1 pkg/12) F14-3028GB
1 pkg Wire, sterling silver dead-soft, 26-gauge round (1 pkg/ 5 feet)
F14-1016WR
1 bottle Omni-gel photo transfer liquid, 8 ounces F14-3011TL
1 pkg Dragonfly charm, pewter with antique finish (1 pkg/6) F14-5122FN
1 Unakite, medium tumbled nuggets F14-6742GS
Tools:
1 pair Scissors, 3 ½ -inch F14-3049TL
1 pair OHM ergo pliers, 5 ¾ -inch short flat nose F14-3177TL
1 pair Crimping pliers F14-1602TL
Other Materials:
1 pair Tweezers
1 stick Incense
1 Stamp pad or acrylic paint, sienna color
1 sheet Scrapbooking paper
1 Maple seed pod
1 Gold-leaf pen
1 sheet Mica or clear plastic
1 sheet Card stock
2 Label holders, used for labeling boxes, photo storage cases, etc.
1 tube OmniGel image transfer solution
1 pkg Alligator clips
Instructions - Making Label-Holder Pendant
Step 1: Cut two windows of mica to fit inside the label holder. Mica can
be substituted with thin, clear plastic or other durable, transparent
material.
Step 2: Prepare the image-transfer background using a piece of scrapbook paper and OmniGel image transfer solution and following manufacturer’s instructions. Prepared image should be slightly larger than the interior of the label holder.
Step 3: Trim the completed image transfer to fit inside the label holder.
Step 4: Create an aged effect by dabbing antique sienna stamp pad color (or acrylic craft paint) randomly on the surface and around edges of the image.
Step 5: Apply a light coating of OmniGel image transfer solution to the front (right side) of the image transfer paper and glue onto the mica window, image side up (facing through the window toward the viewer) – this is the beginning of the “sandwich.”
Step 6: Glue the maple seed pod to the back of the sandwich from step 5 using small dabs of GS hypo cement. Allow to dry.
Step 7: Cut narrow strips of cardstock to form a frame around the seed pod at the edges, and glue in place with GS hypo cement. Allow to dry.
Step 8: Glue the remaining mica window on top. Allow to dry.
Step 9: Place dabs of hypo cement around the edges of the insides of each of the two label holders and insert completed mica sheets between the label holders. Clip with small alligator clips to hold securely while drying.
Step 10: Dab the gold leaf pen along the edges of the completed charms.
Step 11: Cut a 3-inch length of sterling silver, dead soft, 26-gauge wire and form a wrapped loop to attach the label-holder pendant to a silver plated lobster clasp.
For instructions on how to make a wrapped loop, visit www.firemountaingems.com/beading_howtos.
Step 12: Cut a 3-inch length of sterling silver, dead soft, 26-gauge wire and form a wrapped loop to attach additional embellishments, if desired.
Making Single-Strand Necklace
Step 1: Cut #3 black Silkon cord to desired finished length, leaving 3-4 extra inches on either side. Dab hypo-cement onto each end and let dry.
Step 2: Thread cord through a crimp tube and one end of the dragon clasp. Thread back through crimp tube and close with crimping pliers. Tie an overhand knot next to the crimp tube and dab knot with hypo-cement. Let dry.
Step 3: Clip cord end approximately 5mm from each knot. Touch cord ends with a lit stick of incense to melt and prevent fraying.
Step 4: Position a 3mm sterling silver crimp cover over crimped tube, tucking in cord ends. Close crimp cover with tip of crimping pliers.
Step 5: String one unakite bead snugly against crimp cover and knot cord. Cover knot with a crimp cover and close.
Step 6: String 43 of the 6mm round horn beads, add a 7mm amber round and knot cord. Cover knot with a crimp cover and close. Add one more 7mm amber round and one 6mm round horn. Knot cord and cover knot with a crimp cover.
Step 7: Add unakite bead and a crimp tube. Thread cord through dragon clasp loop and back through crimp tube. Close crimp with crimping pliers and tie an overhand knot next to the crimp tube. Dab knot with hypo-cement and let dry.
Step 8: Clip cord end approximately 5mm from each knot. Touch cord ends with a lit stick of incense to melt and prevent fraying.
Step 9: Position 3mm sterling silver crimp covers over each crimped tube, tucking in cord ends. Close crimp covers with tip of crimping pliers.
Step 10: Attach label-holder pendant to necklace between the two 7mm amber beads.
Making Five-Strand Neckpiece
First Strand
Step 1: Cut #2 black Silkon cord to desired finished length,
leaving 3-4 extra inches on either side. Dab hypo-cement onto each end
and let dry.
Step 2: Thread cord through a crimp tube and one end of the slide clasp. Thread back through crimp tube and close with crimping pliers. Tie an overhand knot next to the crimp tube and dab knot with hypo-cement. Let dry.
Step 3: Clip cord end approximately 5mm from each knot. Touch cord ends with a lit stick of incense to melt and prevent fraying.
Step 4: Position a 3mm sterling silver crimp cover over crimped tube, tucking in cord ends. Close crimp covers with tip of crimping pliers.
Step 5: String approximately 21 large amber ovals onto cord, add one
6mm horn bead and string
13 more large amber ovals.
Step 6: Thread cord through a crimp tube and the other end of the slide clasp. Thread back through crimp tube and close with crimping pliers. Tie an overhand knot next to the crimp tube and dab knot with hypo-cement. Let dry.
Step 7: Clip cord end approximately 5mm from each knot. Touch cord ends with a lit stick of incense to melt and prevent fraying.
Step 8: Position a 3mm sterling silver crimp cover over crimped tube, tucking in cord ends. Close crimp covers with tip of crimping pliers.
Second Strand
Step 1: Cut #2 black Silkon cord to desired finished length, leaving 3-4 extra inches on either side. Dab hypo-cement onto each end and let dry.
Step 2: Thread cord through a crimp tube and one end of the slide. Thread back through crimp tube and close with crimping pliers. Tie an overhand knot next to the crimp tube and dab knot with hypo-cement. Let dry.
Step 3: Clip cord end approximately 5mm from each knot. Touch cord ends with a lit stick of incense to melt and prevent fraying.
Step 4: Position a 3mm sterling silver crimp cover over crimped tube, tucking in cord ends. Close crimp covers with tip of crimping pliers.
Step 5: String one small amber oval bead and one 6mm horn bead. Continue
stringing 28 small
amber ovals, add one 6mm horn bead and 15 more small amber ovals.
Step 6: Thread cord through a crimp tube and one end of the slide clasp. Thread back through crimp tube and close with crimping pliers. Tie an overhand knot next to the crimp tube and dab knot with hypo-cement. Let dry.
Step 7: Clip cord end approximately 5mm from each knot. Touch cord ends with a lit stick of incense to melt and prevent fraying.
Step 8: Position a 3mm sterling silver crimp cover over crimped tube, tucking in cord ends. Close crimp covers with tip of crimping pliers.
Third Strand
Step 1: Cut #2 black Silkon cord to desired finished length, leaving 3-4 extra inches on either side. Dab hypo-cement onto each end and let dry.
Step 2: Thread cord through a crimp tube and one end of the slide clasp. Thread back through crimp tube and close with crimping pliers. Tie an overhand knot next to the crimp tube and dab knot with hypo-cement. Let dry.
Step 3: Clip cord end to approximately 5mm from each knot. Touch cord ends with a lit stick of incense to melt and prevent fraying.
Step 4: Position a 3mm sterling silver crimp cover over crimped tube, tucking in cord ends. Close crimp covers with tip of crimping pliers.
Step 5: String three large amber ovals onto cord and add one 6mm horn
bead. Continue stringing
19 more large amber ovals. Add another 6mm horn bead and string 13 more
large amber
ovals. Add a 6mm horn and three more large amber ovals.
Step 6: Thread cord through a crimp tube and one end of the slide clasp. Thread back through crimp tube and close with crimping pliers. Tie an overhand knot next to the crimp tube and dab knot with hypo-cement. Let dry.
Step 7: Clip cord end approximately 5mm from each knot. Touch cord ends with a lit stick of incense to melt and prevent fraying.
Step 8: Position a 3mm sterling silver crimp cover over crimped tube, tucking in cord ends. Close crimp covers with tip of crimping pliers.
Fourth Strand
Step 1: Cut #2 black Silkon cord to desired finished length, leaving 3-4 extra inches on either side. Dab hypo-cement onto each end and let dry.
Step 2: Thread cord through a crimp tube and one end of the slide. Thread back through crimp tube and close with crimping pliers. Tie an overhand knot next to the crimp tube and dab knot with hypo-cement. Let dry.
Step 3: Clip cord end approximately 5mm from each knot. Touch cord ends with a lit stick of incense to melt and prevent fraying.
Step 4: Position a 3mm sterling silver crimp cover over crimped tube, tucking in cord ends. Close crimp covers with tip of crimping pliers.
Step 5: String 12 small amber ovals and add a 6mm horn bead. String three
more small amber
ovals, one 6mm horn, five more small amber ovals and one more 6mm horn.
String
another 8 small amber ovals, one 6mm horn, seven more small amber ovals,
one 6mm
horn and 14 more small ovals.
Step 6: Thread cord through a crimp tube and one end of the slide. Thread
back through crimp tube and close with crimping pliers. Tie an overhand
knot next to the crimp tube and dab knot with hypo-cement. Let dry.
Step 7: Clip cord end approximately 5mm from each knot. Touch cord ends with a lit stick of incense to melt and prevent fraying.
Step 8: Position a 3mm sterling silver crimp cover over crimped tube,
tucking in cord ends. Close crimp covers with tip of crimping pliers.
Fifth Strand
Step 1: Cut #2 black Silkon cord to desired finished length, leaving 3-4 extra inches on either side. Dab hypo-cement onto each end and let dry.
Step 2: Thread cord through a crimp tube and one end of the slide clasp. Thread back through crimp tube and close with crimping pliers. Tie an overhand knot next to the crimp tube and dab knot with hypo-cement. Let dry.
Step 3: Clip cord end approximately 5mm from each knot. Touch cord ends with a lit stick of incense to melt and prevent fraying.
Step 4: Position a 3mm sterling silver crimp cover over crimped tube, tucking in cord ends. Close crimp covers with tip of crimping pliers.
Step 5: String eight large amber oval beads and one 6mm horn. Add another
four large amber
beads and knot. Add another 17 large amber beads, knotting in between
each bead.
Add a 6mm horn bead followed by nine more large amber ovals. Add one 6mm
horn
and two more large amber ovals.
Step 6: Thread cord through a crimp tube and one end of the slide clasp. Thread back through crimp tube and close with crimping pliers. Tie an overhand knot next to the crimp tube and dab knot with hypo-cement. Let dry.
Step 7: Clip cord end approximately 5mm from each knot. Touch cord ends with a lit stick of incense to melt and prevent fraying.
Step 8: Position a 3mm sterling silver crimp cover over crimped tube, tucking in cord ends. Close crimp covers with tip of crimping pliers.
Step 9: Beginning with the second knotted amber oval in the strand, attach the green and gold leaves in alternating patter by opening loop with pliers and hooking loop over knots. Close loops.
| Project Images | |
 |
|