
603-1
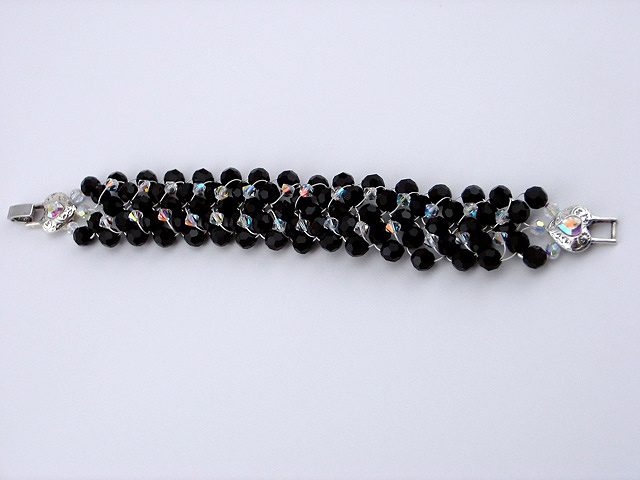
Bejeweled Bracelet
Designed by Katie Hacker
Sponsor: Pure Allure “Crystal Innovations”
For more information visit
This stunning bracelet features two rows of double-needle right angle weave. The unique clasp perfectly complements the design by allowing the cuff to lay flat against the wrist.
Material needed
78 jet 6mm round Swarovski® crystal beads
34 AB clear 4mm bicone Swarovski® crystal beads
Crystal AB love connection Pure Allure “Crystal Innovations”
buckle clasp
Six 14” lengths of .015” diameter silver-plated Beadalon®
49
6 silver 2mm crimp beads
Beadalon® chain nose pliers
Beadalon® wire cutters
Instructions:
1. Gather the wires into three sets of two wires each and string a crimp bead onto the end of each set. Use chain nose pliers to flatten the crimps. (We typically recommend using a crimping tool anytime you crimp but this type of clasp calls for a special exception.)
2. Pass each set of wires through a hole on the clasp, a clear bead and a black bead.
3. Pass the outer wires through another black bead, pick up an inner wire and pass it through the opposite side of the same bead. Pull the wire gently to tighten the stitch. Repeat this step with the other set of wires.
4. Leave one outer wire in each set aside. We’ll pick them up again
in Step 9. Hold the inner wires together and pass them through a black
bead. Pass one outer wire through a black bead.
5. Pass the wires through opposite ends of a black bead to complete one
stitch. Repeat this step with the other set of wires.
6. Repeat Steps 5-6 to make 13 more stitches.
7. Place a piece of tape over the wires to hold the beads in place while you add the clear crystals.
8. Starting back at the beginning of the bracelet, pass an outer wire through the first horizontal black bead. Pass the wire through a clear bead, bring it diagonally across the stitch and through the next horizontal black bead. Repeat this step to add clear beads to both rows of stitches.
9. When you add the last clear bead on both rows, change the stitch to pass the wire back through the outside bead and around the last stitch. If you have trouble keeping the tension here at the end, tape the wires to your work surface.
10. To finish the bracelet, pass each set of wires through a black bead,
clear bead, hole on the clasp and crimp bead. Use chain nose pliers to
flatten the crimp beads. Cut off any extra wire.
| Project Images | |
 |
|