-
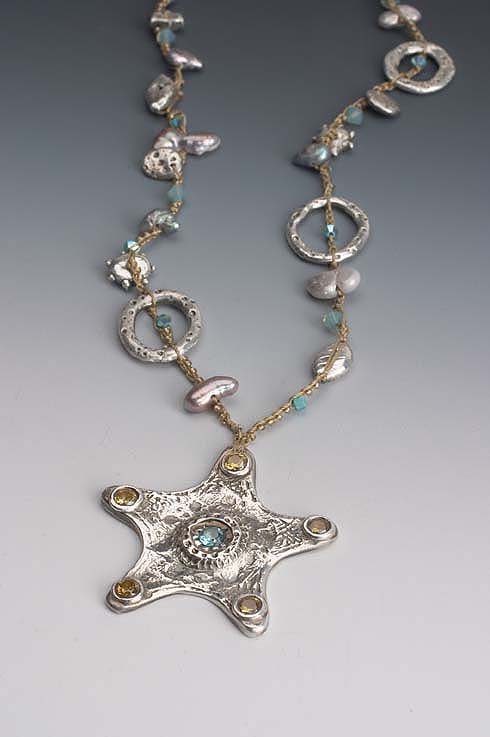
For the centerpiece of this necklace a star shape was molded from a cast ornament. Knead equal parts of each component of 2 part silicone rubber putty until uniform in color.
-
Form into a ball and flatten on a smooth clean surface. Press the ornament face down into the putty, making sure the putty surrounds the ornament on all sides.
-
Let the putty set up with the ornament in place. You can tell when the putty has cured if you press on it with your fingernail and it bounces back without leaving an impression. This takes about 30 minutes or less. Remove the ornament. Press a ball of soft moist metal clay into the mold smoothing the back of the clay to fill the edges of the mold. Remove excess clay as necessary.
-
Turn the mold over and flex to release the clay onto a smooth flat surface. Use a needle tool to make a generous hole for hanging at one of the points, or insert a small eye pin. To add faceted stones to the clay, push CZ stones into the clay. Push them just below the surface of the clay. This will allow the clay to shrink in around the top edge of the stone as it fires, holding the stone in place.
-
If you have shallow areas where you can’t push the stones below the level of the clay, add small ropes of clay to form “bezels” around the stones. Attach the ropes of clay with water and slip around each stone. Let the piece dry until leather hard before refining. When the piece is firm enough to hold its shape, repair cracked areas with a paint brush and water to smooth. After the piece is bone dry, use a nail file to smooth the edges before firing.
-
Set aside to dry as you make the accent bead elements for the necklace.
-
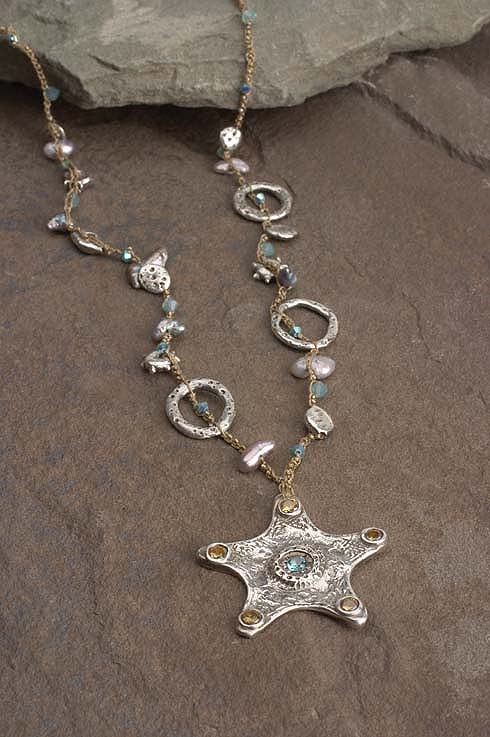
Make organic looking “sea shapes” for the beads that will decorate the necklace. A rope of clay was formed into a ring shape and then textured with a sea shell for this element.
-
Other small bead shapes were formed by hand, using a needle tool to poke holes for stringing later. The clay was left very rough, with very little refinement other than sizing the holes before firing. None of these were formed around bead cores; they were left solid and slightly flattened. Fire the star shaped centerpiece and accent beads as directed for PMC. Brass brush, polish and finish the pieces as desired. Patina if you want to darken the textured areas.
-
Lay out the centerpiece and beads to form the pattern or order for the necklace. Alternate the silver clay beads with seed beads, faceted crystals and freshwater pearls. String half of the necklace onto the end of the bead cord with a beading needle.
-
Make a chain stitch by forming a slip knot about 6 inches from the end of the cord. Insert the crochet hook into the slip knot, and pull tight.
-
To make the first stitch, wrap the yarn over the hook as shown. Catch the cord and pull it through the slip knot. The cord you just pulled through the slip knot will now be on your hook forming one chain stitch. Repeat the process again; yarn over and through the next stitch. Make a few chain stitches with the cord to get started. To begin crocheting beads along the chain, slide the first bead down (this will be the last one added to the cord). Move the bead close to the last chain stitch you just made and form the next stitch AFTER the bead on the cord. Crochet a chain stitch behind each seed bead on the cord. All of the beads along the cord are crocheted into the chain in the same manner. Slide the next bead down and continue the chain stitch.
-
As you are crocheted the first half of the necklace, measure the length to match half of the desired finished length. If you need to add a few beads, you can unwind a few yards of cord from the card and add them to the other end with a beading needle. If you have too many beads, slide them down the cord to use for the other side. Add the center piece by pinching the cord in half and passing it through the hole for hanging (this will make a loop). Pull the loop through the hole so that it is big enough to pass both cords and hook through to form a lark’s head knot.
-
Continue with the other side of the necklace. Finish with a series of seed beads and a few chain stitches at the end, making sure both sides are even in length.
-
The necklace can either be tied on by leaving the ends long with beads tied to the ends, or tie on a purchased clasp to finish.