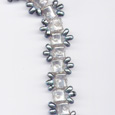
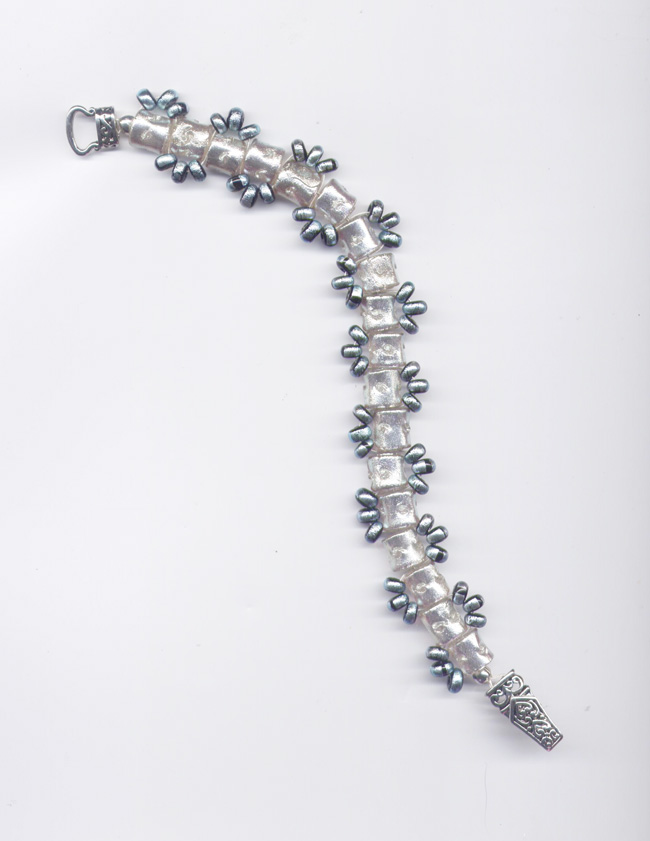
- 15- #40 /Textured tube beads from PaulaRadke.com (14 colors available)
- 45-#19/mini dichroic rondelles PaulaRadke.com (21 colors available)
- 2-25 inch lengths of Beadalon .018 diameter beading wire
- 2- crimp beads
- 2- crimp covers
- 1-clasp of your choice (fold over magnetic clasp shown from Mobile-Boutiquebeads.com)
:
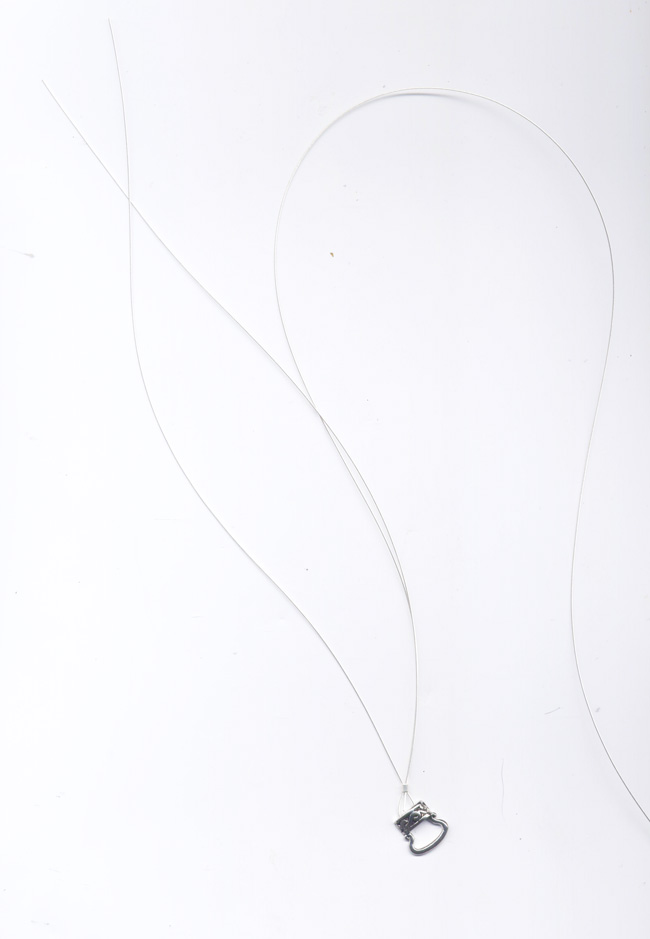
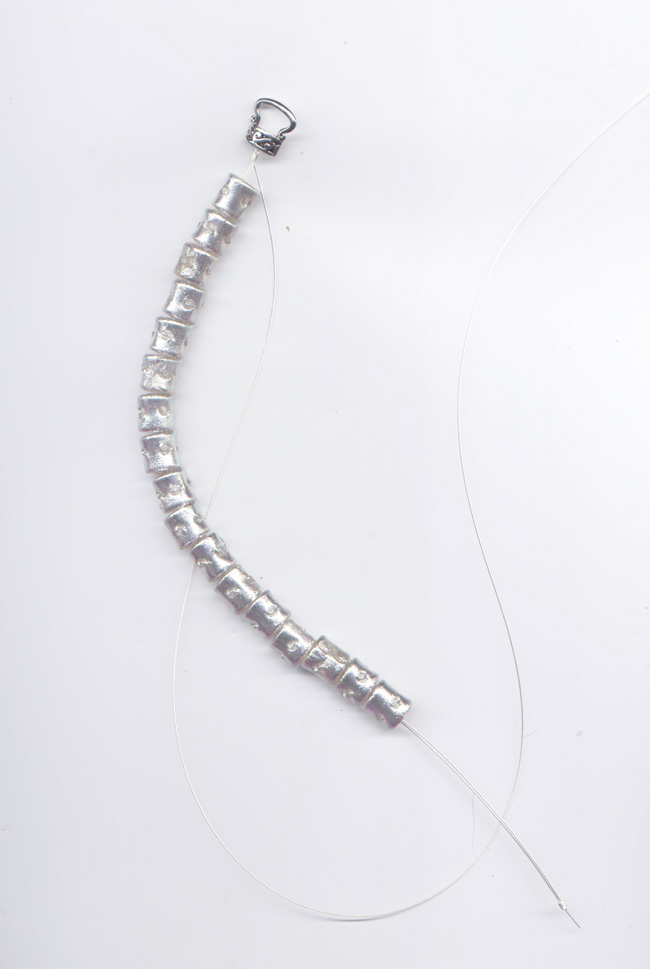
1. Start with two pieces of beading wire (Beadalon .018 diameter). Fold one piece in half and run it through your clasp so that the clasp is in the middle of the wire length. Slide a #3 crimp tube on both of the wires attached to the clasp and put the second 20” length inside the crimp from the non-clasped side. Pull tight against the clasp and crimp catching the three pieces of beading wire in the crimp. Cover with a crimp cover.
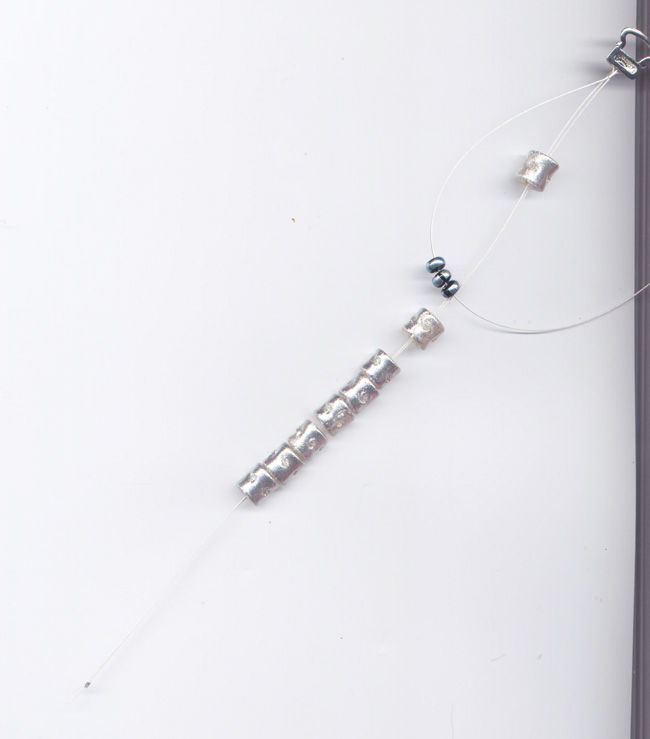
2.String on the bigger beads you are using on to the doubled strand. You can measure as you go to reach 7” – 8” for the desired length of your bracelet. Use a bead stopper to hold them on or crimp the ends together as a temporary “holder”. If you use a crimp to hold them on, be sure to give your self plenty of room for final crimping of the clasp by crimping at the very end of the beading wires.
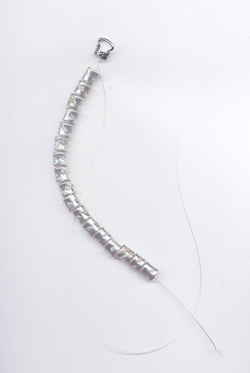
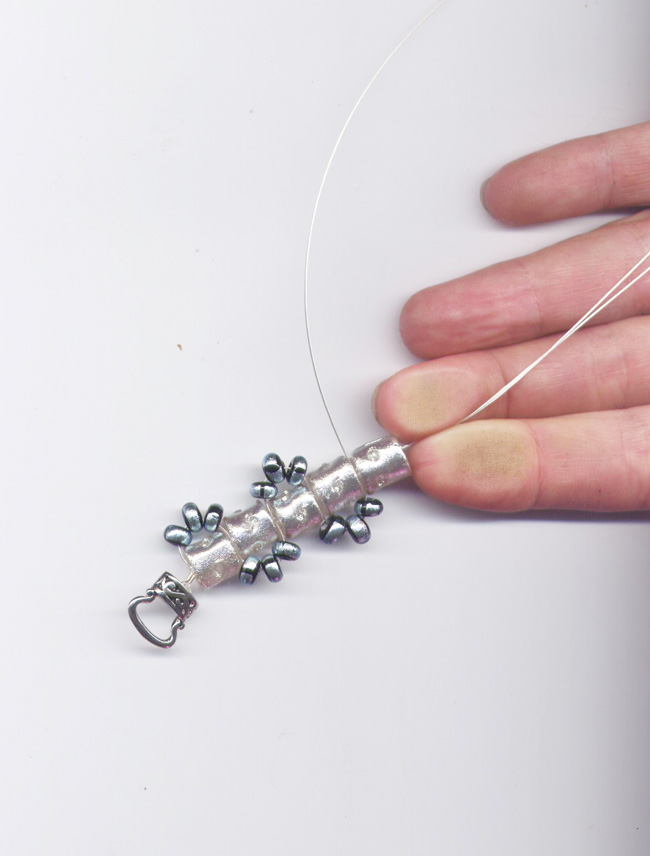
3. Pick up three of the smaller beads with the third and longest bead wire. Push the first large bead close to the clasp, separate the doubled beading wire and run the long strand with the three small beads between the two strands holding the bigger beads. Push up another large bead to hold everything in place and pull to tighten the strand with the three small beads in place along side of the first large bead.
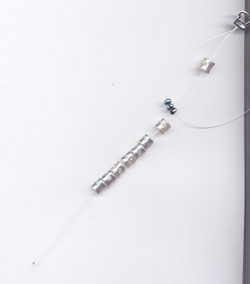
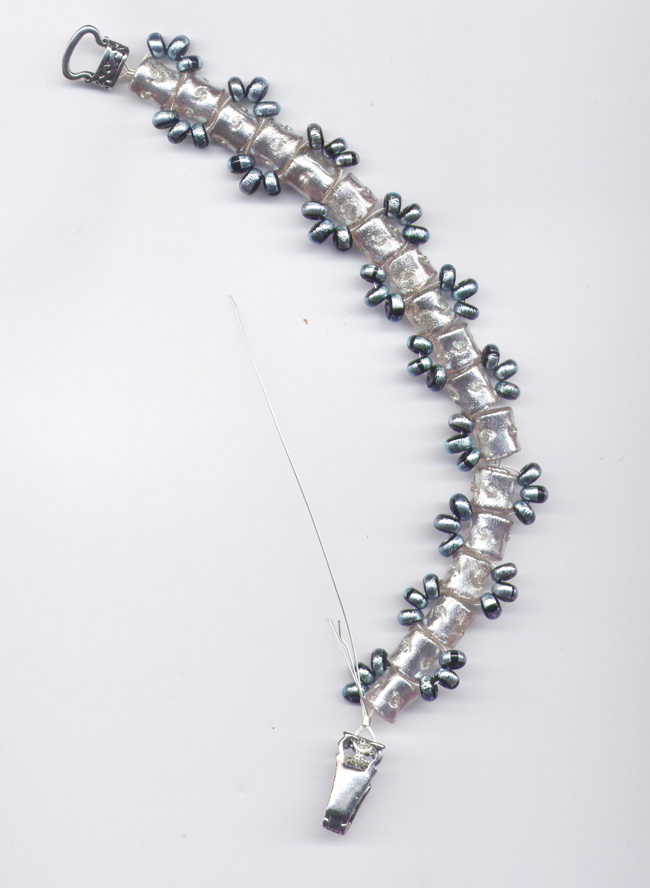
4. By continuing to repeat this step, you will find that the three small beads alternate sides. Push the next bead up on the doubled beading wire to hold everything in place as you work. Continue until your bracelet is as long as you want it. Consider the length of the other half of the clasp which will now be attached.

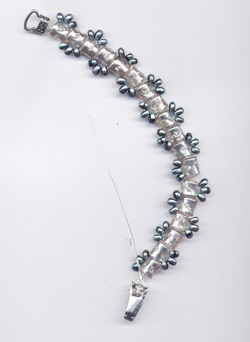
5. String all three ends of the beading wire through a #3 crimp tube through your clasp and back through the crimp. If you use a .018 wire and a #3 crimp tube they will fit! Crimp and cover. Photo
Variation: Use stretchy Elasticity instead of the wire. The instructions are the same but you would tie off the clasp instead of crimping. This makes a beautiful flexible bracelet. Using the wire you need to keep it slightly loose so that it bends nicely. It will be a little stiffer than the Elasticity. |